Link to the website
Link to the Github repository
The project was a funny way to get back on some poor written Javascript code, some canvas action an a bunch of rules and constraints on the tile placement. In the end, it took me a lot more time figuring out how to handle the generation and drawing on screen panning than the actual placement itself.
For the first time ever I used Python as backend. It's only serving a static folder, but it was interesting learn how to configure an HTTP server and make it run through pm2 (more on this below).
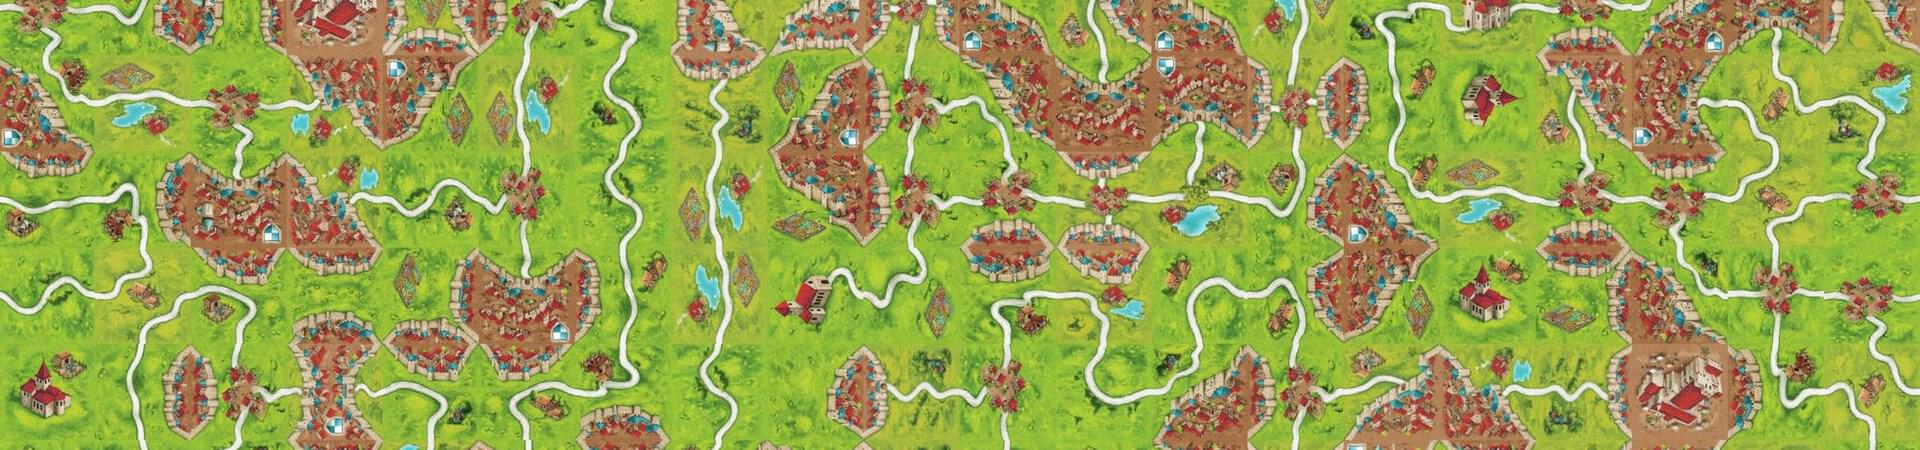
A fast Google search yielded some good results. The best one is from Board Game Arena, a website that let you play tabletop games on your browser. Actually I got the most of my games there and I'm still paying for the premium account, so I didn't feel too bad about stealing from them.
The image was a big map of every tile (including from game expansions), like a tilesheet. To cut it into pieces, I used Adobe Photoshop: the Slice Tool has a function to divide the slices given how many per side, then the function "File > Export > Save for Web" let me exports each slice separately.
A bunch of tidy up is in order: the images are already small, but I gave them a go under Imagemagick to strip unsed data and compress a bit more, saving overall a bunch of kilobytes. I had to rename them, this time I have used the PowerRename tool from Microsoft PowerToys. It works pretty good, there aren't a lot of options but enough to get things done, although I think I will download Bulk Rename Utility, a powerhouse in this kind of application.
There was not really an environment setup. I wanted the thing to be fast and dirty, so pure Javascript and HTML, inline CSS when needed, no fancy tools. I was tempted to bootstrap a fast Gulp pipeline similar to the one I'm using on the blog, but it is pretty bloated and an overkill for this application.
The actual server was written almost at the end of the project, in development I simply used a command for Python 3:
python3 -m http.server --directory dist
It serves the dist directory on port 8000 (you can change port too adding another argument).
The body is pretty simple: a bunch of img tags (one for each tile) inside an hidden div to make the images load, then the canvas and at the bottom the script.
To generate that bunch of img tags I expanded an Emmet string directly in Visual Studio Code. It comes already integrated to the editor, and in cases like this is a very useful tool. This was the string I expanded:
img#tile-$$[src="/tiles/tile_$$.jpg"]*68
That strange bunch of symbols means:
At the top of the code there are the definitions for the tiles, their edges and the corresponding image IDs (some tiles have the same edges and different drawing). This is the model I used:
const TILES = [{
    ids: [1, 2, 3],
    edges: ['city', 'city', 'road', 'city'] // top, right, bottom, left
},

...

];
I've decided to put the edges on an array to make the tile rotation much simpler (described below). I haven't used any type of enum, which are not supported by native Javascript yet, and use strings instead. It's error prone, I had to double check every word for every tile twice to make sure. Listen, fast and dirty were the principles of this project, and in this case (and other cases too) I went full dirty. Don't judge me for having a little fun.
There is another structure I used: while the one above is more a definition of a tile, once generated the tile itself is added to the grid following this model:
{
    tile: {}
    rotation: 0, 90, 180, 270
    index: 0-68
}
The grid containing those objects is just an array of arrays. I didn't think about the negative indices at the start of the project, but then the problem solved itself when I discovered that Javascript accepts negative indices for array. Weird!
There is a bunch of code right in the beginning to find the canvas, resize in and get the context:
const SIZE = { x: 128, y: 128 };

const c = document.getElementById('main-canvas');
c.width = document.body.clientWidth;
c.height = document.body.clientHeight;

const ctx = c.getContext('2d');
Pretty standard JS code for working with canvas, nothing fancy yet. Under that, there are a bunch of constant initialization I used in various places later:
const HOR_TILES = Math.ceil(c.width / SIZE.x);
const VER_TILES = Math.ceil(c.height / SIZE.y);

const GRID_SIZE = { x: HOR_TILES, y: VER_TILES}
const GRID = Array(GRID_SIZE.y).fill().map(() => Array(GRID_SIZE.x));
const GRID_OFFSET = { x: 0, y: 0 };
const OFFSET = { x: 0, y: 0}
GRID_OFFSET and OFFSET are very different: the first one is the grid position of the square on top left of the screen and it's used to determine which tiles to show on screen, the second one is a global pixel offset, given by the pan.
The GRID is initially filled with an empty array, although is not really needed and the code should work anyway.
There are a bunch of functions used around the code to get things done. Or to know things. If you are still reading you know what a function is. There are the descriptions:
The whole method is not really efficient, but it's also called once in a while, only when a new square is unveiled, so I didn't bother too much to make it more performant. Actually, I didn't bother at all.
This is the flow:
This method is called once on beginning to generate the initial grid, then during panning if the GRID_OFFSET changes.
I tried also write a method that accepts an array of coordinates of squares that I know be empty from the previous step to improve performances, but after a good hour wasted, I rolled back to this version and move forward.
There are event handlers for mousedown, mouseup and mousemove to retrieve how much the user moved during panning. On the mousemove handler, OFFSET and GRID_OFFSET are recalculated, and if the latter one is different from the current one means that new blocks are unveiled, so the GRID should be filled on the missing spots. Furthermore, each time this handler is called, the context gets cleared and printed again.
I actually put online the project before realizing that was not working on mobile. The joy of mobile devices, how much fun I had in the past.
Handling touch inputs is really another beast: the touch is not a single one, but an array of them (to give them multitouch capabilities), and they should be handled saving the touch IDs, etcetera etcetera. I was already pretty tired of this project, I was giving up on mobile support when I found this method on StackOverflow, claiming to simulate mouse events on mobile. I shamelessy copy and pasted the code and, with great surprise of mine, it worked! Thank you unknown programmer.
Your Internet speed doesn't matter: loading 68 tiny images is not instantaneous. Without the loading code, most of the squares would be white the first time visiting the page. I did a couple of tries and window.onload seems to get called with the right timing.
The first iteration of the loading method was adding a listener to the onload event for each image, then compare the number of loaded images with total images. If the number is the same, means the images finished loading. This was working, but if the images are cached, sometimes onload is not called in time.
As I said above, the server is written in Python and run through pm2 changing the interpreter, solution I really like because is in line with the other application running on my VPS. I mean, it's not Docker, but it's still good enough for my things.
I had some issues with the code: to make the Python socketserver serve a directory you need to define an handler. I found the code pretty fast on StackOverflow, but it was working on my local machine, but not on the VPS. After a bunch of searches, I figured out I was using two different version of Python: 3.8 on my machine, 3.6 on VPS.
Then I just updated Python to 3.8 on the VPS, right? Wrong! I use CentOS on the VPS and there is no Python 3.8 precompiled package available on yum, so I had to download the sources and compile it by myself.
Luckily following this guide made compiling and installing very easy and uneventful, so mission complete!
The configuration file for pm2 is very basic, the only notable thing is the interpreter property pointing to the new installed Python version:
module.exports = {
    apps: [{
        name: 'Infinite Carcassone',
        interpreter: '/usr/local/bin/python3.8',
        script: 'server.py'
    }]
}
In hindsight, the project was very fun in a lot of different ways: no taskrunner, no Node.js, no external libraries, trying to remember how JS canvas works, handling the panning and finally generating the tiles.
It took me about 6-8 hours, including writing this postmortem, so a fair amount of time, but not really stretched into boring and frustration, so I'm very OK on this timeframe.
About the postmortem: this is the first one I write under the new "regime": it took me almost 2 hours, but I was very thorough on technical things, explaining code almost line by line. I think for future projects I will slim down this step quite a bit, talking mostly about the challenges and the acquired knowledge, and leaving the technicalities for myself of the future.
